Yes, you can convert a logo into a stitch-ready embroidery file, and the right route depends on how detailed your artwork is. DIY works well for simple marks with bold shapes and few colors. Fine detail, small text, unusual fabrics, or production runs call for a professional digitizer. Either way, plan for a physical test stitch before you commit to a full run, and know that machine files like .DST look nothing like the vector art you started with.
TL;DR:
- Manual digitizing is essential for high-quality embroidery, especially for intricate designs, detailed text, or production runs with consistent quality.
- Using vector artwork, simplifying color palettes, and removing gradients improve stitch quality and reduce costs by minimizing thread changes.
- A physical sew-out on the same fabric and stabilizer helps identify issues like density, registration, and thread jumps before mass production begins.
- Smaller logo sizes, especially on hats or curved surfaces, require careful planning of stitch widths and may need separate versions for different placements.
- Outsourcing to professional digitizers is cost-effective for larger or complex orders, while DIY and AI tools are suitable for prototypes or one-off projects.
Table of Contents
- How Do You Digitize a Logo for Embroidery?
- Preparing Artwork: Why Vector Files Beat Raster Images
- Software and AI Tools vs. Hiring a Manual Digitizer
- What File Formats Do Embroidery Machines Actually Use?
- How Big Should an Embroidered Logo Be?
- How Fabric and Stabilizer Choice Changes Your Digitizing Settings
- What’s the Minimum Stitch Width for Embroidered Text?
- The Test Stitch Checklist Every Order Needs
- What Does It Cost to Digitize a Logo?
- Common Pitfalls When Digitizing a Logo
- Converting a Complex Logo Into Something Embroidery Can Handle
- Keeping Your Logo Consistent Across Fabrics and Products
- When Is It Worth Learning Digitizing Yourself?
- Get Your Logo Digitized by Lee Embroidery
- Sources
- FAQ
How Do You Digitize a Logo for Embroidery?
Converting artwork into embroidery is a distinct process from resizing an image in Photoshop. You’re building a set of machine instructions, stitch by stitch, that a needle will physically follow. Here’s the workflow that professional digitizers and solid embroidery software both follow, whether you’re doing it yourself or briefing someone else.
-
Size the logo to its final embroidery dimensions first. Set up a sizing box, commonly 3 inches by 3 inches for a left chest mark, and build everything inside that boundary. Digitizing at the wrong scale is the single most common reason a finished patch looks nothing like the mockup.
-
Choose your fabric and stabilizer settings before you digitize anything. This sounds backward if you’re used to graphic design, where the file exists independent of its output. In embroidery, a practical digitizing workflow starts with importing and sizing artwork, then choosing fabric settings before digitizing shapes and text, because fabric determines your underlay pattern and how much the stitches will pull in during sewing.
-
Build stitch objects by type, not by shape. Narrow columns like letter strokes or borders get satin stitches. Large solid areas get fill stitches. Connecting paths between sections get run stitches, kept as short and hidden as possible.
-
Sequence everything to minimize trims and color changes. This is where manual digitizing pulls ahead of automated tools. A skilled digitizer plans the stitch order so the machine moves logically across the design instead of jumping back and forth, which cuts down on thread breaks and jump stitches.
-
Digitize text last, and digitize it carefully. Small lettering needs minimum stitch widths to stay legible, which we’ll cover in detail further down.
-
Export in your native software format and the machine format your embroiderer needs. Save the editable project file for future changes, then export the production file.
-
Save separate versions for separate placements. A file digitized for a 4 inch chest logo will not translate cleanly to a 2 inch hat design. Build placement-specific versions rather than just scaling one file up or down.
This is the same sequence that industry guidance on digitizing outlines: import and size, set fabric parameters, digitize the main shapes, handle text, test stitch, then refine. Skipping steps to save time almost always costs more time later, usually in the form of a ruined sew-out.
Preparing Artwork: Why Vector Files Beat Raster Images
Vector files (AI, SVG, EPS) give a digitizer clean, scalable edges to work from. Embroidery digitizing converts artwork into stitch commands, and vector art is generally the preferred starting point because of its clean edges, though a vector file is not itself an embroidery file. It’s a blueprint, not the building.
If vector art doesn’t exist, the highest-resolution PNG or TIFF you can find is the next best option. A logo pulled off a website at 72 dpi will force a digitizer to guess at edges that should have been crisp lines, which introduces errors before digitizing even starts.
Cleanup matters just as much as file format. Clean artwork with high contrast, limited colors, and defined edges reduces technical hurdles for both manual and AI-assisted conversion, so before you send anything off, work through this list:
- Remove hairlines and any detail thinner than a stitch can realistically render.
- Eliminate gradients and blends; flatten them into solid shapes, since thread can’t fade the way ink does.
- Cut your color count down to what the design truly needs. Every added color means another thread change on the machine.
- Add a background fill or outline when the logo will land on a garment close to its own color, since embroidery has none of print’s contrast tricks.
- Build a separate embroidery-specific version of the logo when the original has effects, like drop shadows or fine gradients, that simply don’t translate to thread.
A logo that reads perfectly as a JPEG can turn into a muddy blob once it’s stitched, and cleanup is where you catch that before it costs you fabric and thread.
Software and AI Tools vs. Hiring a Manual Digitizer
Automated tools have gotten genuinely good at quick conversions. AI-assisted conversion tools give fast previews and export options but need review and a physical test stitch, since they can’t fully account for fabric and machine variables. That’s a fair trade for a rough mockup or a one-off gift.
Production work is a different story. Manual digitizing remains the standard for high-quality results because a person can sequence stitches strategically, minimizing thread breaks and jumps, something software still struggles to do consistently. A logo with fine text, overlapping shapes, or unusual textures needs that human judgment.
- Use AI or auto-digitize tools for prototypes, internal mockups, and fast client previews.
- Hire a professional digitizer for anything going into production, apparel with a paying customer, or fabrics that punish sloppy pathing, like fleece or performance knits.
- Treat any AI-generated file as a draft, never a final, until it’s been sewn onto real fabric.
Pro Tip: Run the same logo through an AI tool and a manual digitizer once, side by side, and compare the stitch counts. The gap in trims and jump stitches usually tells you everything you need to know about which route to trust for repeat orders.
What File Formats Do Embroidery Machines Actually Use?
Your logo file and your embroidery file are never the same thing, and this trips up more first-time customers than any other part of the process. A vector logo tells a printer where to put ink. A machine file tells an embroidery head where to put a needle, in what order, and how many times.
- .DST is the closest thing embroidery has to a universal format, widely accepted across commercial machines.
- .PES is common on home and hobbyist Brother machines.
- .JEF is used by Janome machines.
- .EXP works with Melco and some Bernina models.
- .VP3 is used by Husqvarna Viking and Pfaff machines.
If you want the ability to edit the design later, ask your digitizer for the native project file, such as a Wilcom or PES source file, in addition to the machine format. Always confirm which format your embroiderer actually accepts before you export anything. Guessing wrong means paying for a second conversion.
How Big Should an Embroidered Logo Be?
Size drives legibility more than almost any other factor in embroidery, because thread has a physical minimum resolution that pixels don’t. Common sizing guidelines put left chest logos sized within a typical range suitable for embroidery, with hat designs sized smaller due to curved surfaces limiting detail, and going below those ranges usually means losing fine detail entirely.
- Left chest placements: roughly 2.5 to 4 inches wide, depending on the logo’s shape and how much text it carries.
- Hats and caps: roughly 2 to 2.5 inches tall, since the curved surface limits how much detail survives.
- Back panels and jackets: can run considerably larger, but density and stitch count climb with the size, which affects both cost and stiffness.
Small text and intricate details rarely survive a size reduction gracefully. Adding an outline or a solid background block can rescue contrast that would otherwise get lost. The smartest move is building separate versions of your logo for each placement rather than forcing one master file to do every job. A design that reads perfectly at 4 inches on a jacket back may turn to mush at 2 inches on a hat.
How Fabric and Stabilizer Choice Changes Your Digitizing Settings
The same logo file needs different underlay and density settings depending on what it’s stitched into. Wovens like twill hold stitches tightly and tolerate denser fills. Stretchy knits need more underlay and pull compensation to keep the design from distorting once the garment moves. Caps require a specific curved-surface approach that flat-panel settings simply won’t handle correctly.
- Specify your fabric type and stabilizer choice whenever you request digitizing, since a digitizer working blind will default to generic settings that may not hold up.
- Heavier fabrics like fleece or canvas often need denser underlay to prevent stitches from sinking into the pile.
- Needle and thread choice matter more on specialty fabrics; a digitizer may recommend a test hook on an unusual material before committing to a full production run.
Getting this wrong doesn’t just look bad. It shows up as puckering, shifting, or a logo that looks flawless in the hoop and warped once it’s off the machine.
What’s the Minimum Stitch Width for Embroidered Text?
Text is where most logo conversions fall apart, and it’s worth treating separately from the rest of your design. Text often causes the most trouble in digitizing, and letters need a minimum stitch width, ideally 1 to 1.3 mm, or an embroidery-optimized font to stay legible. That range isn’t arbitrary. Below it, satin columns collapse into a solid blob and individual letters blur together.
- Stick to embroidery-friendly fonts, or bump up the weight of a thinner typeface before digitizing.
- If your brand’s wordmark uses a delicate script, consider converting small instances of it to block initials instead of forcing the full name into a tiny space.
- Measure stitch width with your software’s ruler tool and preview the design at its actual finished size, not zoomed in on a screen, before you export anything.
Digitizers commonly swap out a custom font for an embroidery-optimized one specifically to protect legibility once a design shrinks down to patch size. If your logo has small text, expect this conversation before your first sew-out.
The Test Stitch Checklist Every Order Needs
A test stitch, often called a sew-out, is the point where theory meets thread. A physical sew-out is essential because previews and AI-generated files can’t account for machine tension, stabilizer behavior, and fabric quirks, and skipping it is how a bulk order turns into a bulk reprint.
- Stitch the sew-out on the same fabric and stabilizer combination you’ll use for the real run, not a generic test swatch.
- Check placement first. Is the design centered where it’s supposed to be, relative to seams, collars, or edges?
- Check color match against your brand’s actual thread standards, not just how it looks on a monitor.
- Inspect stitch density. Too sparse looks thin and cheap; too dense can cause puckering or stiffness.
- Look for trims, jumps, and thread breaks, which usually point back to pathing problems in the digitizing stage.
- Examine edge definition, especially on satin borders and small text.
- If the item will be washed, test that too. Some fabrics shift or shrink in ways that reveal registration problems only after a wash cycle.
Only sign off on full production once a sew-out clears every item on that list. A sew-out lets a digitizer fine-tune density and underlay for the specific machine and stabilizer in play, and catching a problem here costs one test hoop instead of a few hundred ruined patches.
Pro Tip: Photograph every sew-out and date it. If a revision goes sideways later, you’ll have a clear before-and-after record to show exactly what changed and when.
What Does It Cost to Digitize a Logo?
Costs and timelines vary widely depending on which route you take and how complex your logo is.
- DIY software or AI conversion tools carry low upfront cost but eat your time, especially the first few attempts while you learn pathing and density.
- Marketplace digitizers commonly charge somewhere in the $20 to $75 range for a single straightforward design, though pricing climbs with detail and text.
- Professional shops often charge more per design but typically bundle in a sew-out, a round or two of revisions, and delivery in multiple machine formats, which can save money overall by avoiding rework.
Before you commit to any option, ask directly whether a sew-out and revisions are included in the quoted price. A cheap digitizing fee that doesn’t include a test stitch or a revision round can end up costing more once you factor in a failed first run.
Common Pitfalls When Digitizing a Logo
The same handful of mistakes show up again and again, regardless of whether the digitizing was done by software or a person.
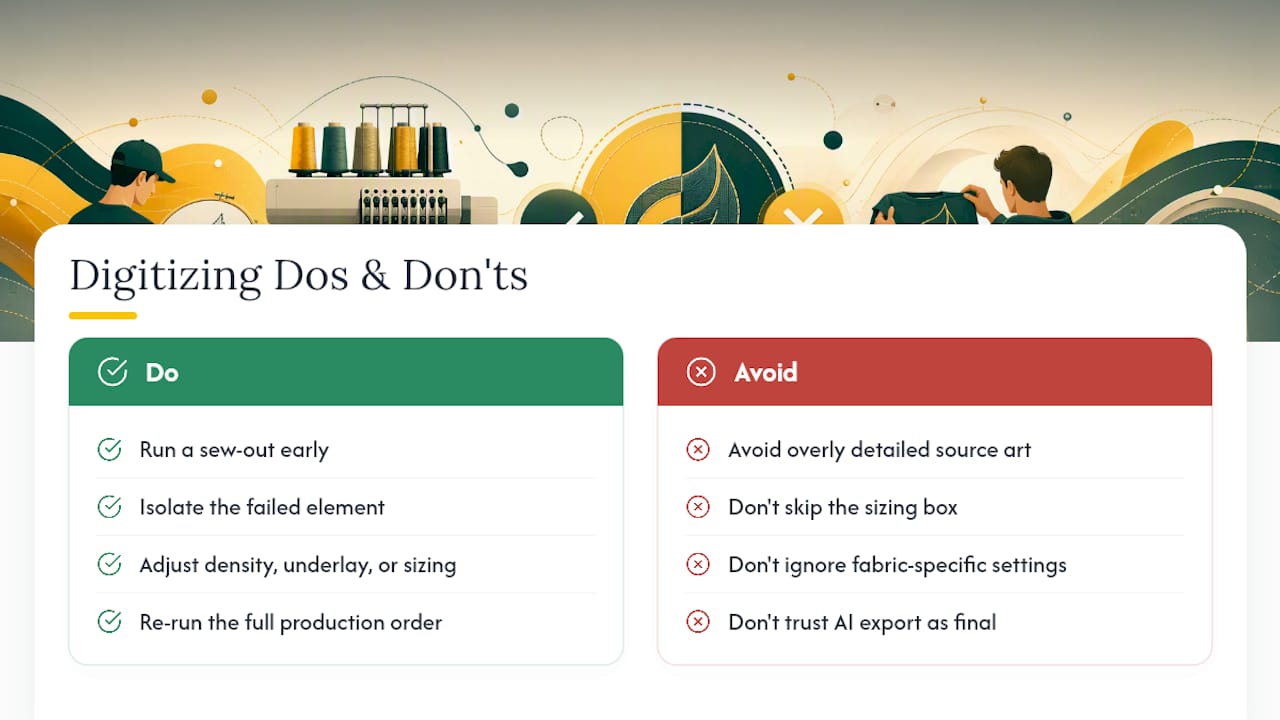
Overly detailed source art is the top offender. A logo with fine gradients, thin script, or a dozen colors was built for screens and print, not thread, and forcing it into embroidery without simplification produces a muddy result every time.
Skipping the sizing box comes in second. Digitizing a logo at one size and expecting it to scale cleanly to another almost never works, particularly with text.
Ignoring fabric-specific settings causes puckering, shifting, and registration problems that look fine on a digital preview and fall apart the moment a needle hits real fabric.
Trusting an AI export as final is an easy trap, since the preview often looks convincing on screen while the underlying pathing and density are still generic guesses.
Underestimating trims and jumps is subtler but expensive at scale. A design riddled with unnecessary color changes and travel stitches takes longer to produce and costs more in machine time, even if it looks identical to a cleaner file once finished.
When something goes wrong, the fix is almost always the same: go back to the sew-out, isolate exactly which element failed, and adjust density, underlay, or sizing before running the full order again.
Converting a Complex Logo Into Something Embroidery Can Handle
A logo built for a website header, full of gradients, drop shadows, and fine linework, rarely survives a direct conversion to stitches. The fix isn’t better digitizing software. It’s building an embroidery-specific version of the mark before digitizing even starts.
Start by identifying which elements actually matter to brand recognition. Most logos have one or two core shapes and a wordmark that people actually recognize; everything else is decoration that print allows and embroidery punishes. Strip the design down to those essentials.
Next, consolidate your color palette. A logo with eight colors in print might work with four or five in thread, since embroidery machines change colors physically and every extra color adds cost and production time.
Flatten any gradients into solid color blocks, choosing the dominant tone from the blend. Thicken any line under about a millimeter, since anything thinner risks disappearing once it’s stitched. If the logo includes a tagline or fine print, consider dropping it entirely from the embroidered version. Not every element that exists in your brand guide belongs on a patch.

The goal isn’t a lesser version of your logo. It’s a version built to succeed in a medium with different physical rules than a screen or a printed page.
Keeping Your Logo Consistent Across Fabrics and Products
A logo that looks sharp on a polo can look completely different on a fleece jacket or a structured cap, even using the identical digitized file, because the underlying fabric changes how stitches sit and pull.
The most reliable fix is maintaining a small library of placement and fabric-specific versions rather than one master file stretched across every product. A version built for flat cotton twill needs different underlay than the same design stitched on a curved cap panel or a stretchy knit polo.
Keep a reference sheet of thread colors tied to your actual brand palette, not just visual approximation, so a batch ordered in March 2026 matches one ordered in October. Thread manufacturers use standardized color numbering systems, and locking those numbers into your specs prevents drift between production runs and between different embroidery shops if you ever switch vendors.
Whenever you add a new product to your lineup, whether that’s a new garment style or a new fabric weight, treat it as a reason to request a fresh sew-out rather than assuming your existing file will transfer cleanly. It’s a small extra step that protects the consistency your brand depends on.
When Is It Worth Learning Digitizing Yourself?
Manual digitizing is a skill worth building if you’re running consistent production, a merch line, a team apparel program, or anything that repeats month over month. The upfront learning curve pays for itself once you’re not paying per-design fees for the tenth reorder of the same hat logo.
If you need a single sew-out, lack a machine to test fabric behavior properly, or you’re ordering once and moving on, outsourcing almost always saves time and material. Rework on a bad batch costs more than a modest digitizing fee ever will, and a botched logo on customer-facing merchandise costs more than money. It costs trust in your brand.
— Bilal
Get Your Logo Digitized by Lee Embroidery
Skipping the trial-and-error entirely is the fastest route to a clean, production-ready patch, and that’s exactly where Leeembroidery comes in. Instead of testing AI tools and marketplace gigs one at a time, you send your artwork once and get a digitized file, a sew-out photo, and a complimentary sample to confirm before you commit to a full order.

To get a fast quote, send over your vector file, or your highest-resolution artwork if that’s all you have, along with your desired size, intended placement, fabric type, and preferred delivery format. Leeembroidery’s custom patch manufacturing services cover embroidered, PVC, leather, chenille, woven, and printed patches, with full customization on shape, backing, and border style. If your order is heading into a larger production run and you need packaging or fulfillment support on top of the patches themselves, BlackSea LOGI’s production services are worth a look for that next step.
Orders typically include a sew-out photo for approval before production runs, allowing a preview of the logo appearance in thread before shipping. Head to the Leeembroidery quote page to submit your artwork and get pricing back quickly.
Sources
- What Is Embroidery Digitizing? | TEX Inc
- How to Digitize a Logo for Embroidery | Embroidery Legacy
- Stitchpilot
- How do I prepare my design for embroidery? | Printify Help Center
FAQ
How Can I Create a Logo for Embroidery?
Start with clean vector artwork, limit your color count, remove fine gradients or hairlines, and size the design to its final embroidery dimensions before digitizing.
How Much Does It Cost to Digitize a Logo for Embroidery?
Marketplace digitizers commonly charge between $20 and $75 for a single design, while professional shops often charge more but may include a sew-out and revisions in that price.
How Can I Convert an Image to Embroidery?
Import the highest-resolution image available into digitizing software or an AI conversion tool, size it correctly, assign stitch types to each shape, then run a physical test stitch before final production.
Can I Digitize a Logo for Embroidery for Free?
Some AI-assisted tools offer free or low-cost logo conversion, but the resulting file still needs a physical sew-out to check pathing, density, and fabric behavior before it’s production-ready.
What File Format Do Embroidery Machines Use?
Most commercial machines accept .DST files, while home and specialty machines may require .PES, .JEF, .EXP, or .VP3 depending on the brand.