A good event patch design starts with one decision: what the patch has to do. Is it a badge for staff, a keepsake for attendees, a team identifier or a giveaway? Once you know that, the rest follows: a simple, bold design built from your event’s visual identity, a material that fits how the patch will be worn, and artwork prepared so every letter stays readable in thread. This guide walks you through each step, from first sketch to final order.
TL;DR
- Define the event’s purpose, audience and brand before you draw anything, then keep the patch consistent with your other event materials.
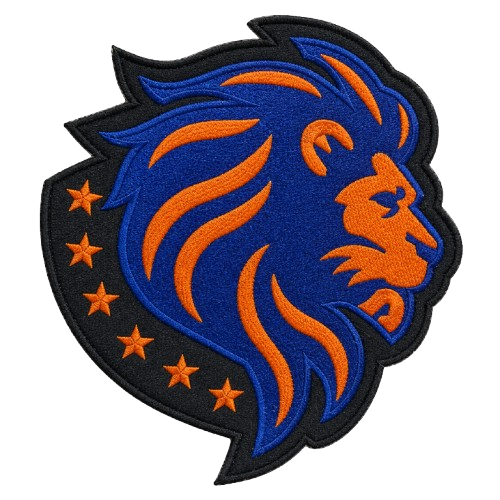
- Keep the design simple: bold shapes, few colors, short text. Fine detail and tiny lettering are what fail first in thread.
- Match the material to the use: embroidered for classic and everyday, chenille for a varsity look, PVC for weather and bold relief, woven for fine detail, printed for photographic art, leather for a premium feel.
- Choose size, border and backing together, and ask for a free sample before a bulk run.
- Send vector artwork if you have it, and settle quantity and timing early so the patches arrive before the event.
Table of Contents
- Start with purpose, audience and identity
- Design for thread, not for a screen
- Choose the material that suits the event
- Choose size, shape, border and backing together
- Prepare the files your manufacturer needs
- Plan quantity, complexity and timing
- A pre-order checklist
- Carry the design beyond the patch
- Our perspective
- Ready to see your design as a patch?
- FAQ
- Sources
Start with purpose, audience and identity
Before you open a design program, write down three things: who will wear or keep the patch, where it will end up, and what the event stands for. A conference patch for staff jackets has a different job than a charity ride patch that attendees sew onto a vest, or a convention patch that collectors trade.
Event media publisher BizBash advises defining your brand, goals, values, mission and target audience first, because those answers guide every design choice and keep the visuals aligned with the message. It also suggests building a clear brand story and using mood boards or design decks so everyone on the team is working from the same picture.
The same article quotes A.Rose Media founder Alexa Carlin on logos: they should be simple, versatile and reflective of the brand, and consistent colors, typography, imagery and graphics reinforce recognition across event materials. A patch is a small, permanent version of that idea. It should look like it belongs next to your signage, lanyards and website.
A quick worksheet helps:
- Purpose: keepsake, staff identification, team uniform, giveaway, fundraiser or collectible.
- Audience: attendees, volunteers, athletes, sponsors, kids or adults.
- Where it goes: jacket, cap, bag, vest, sleeve or lanyard.
- Identity: your logo, two or three brand colors, one typeface.
- Quantity and deadline: how many, and the date the patches must be in hand.
If you want inspiration at this stage, our list of 14 event patch ideas with a style and setup tip for each shows how different events translate the same brand into different patch styles.
Design for thread, not for a screen
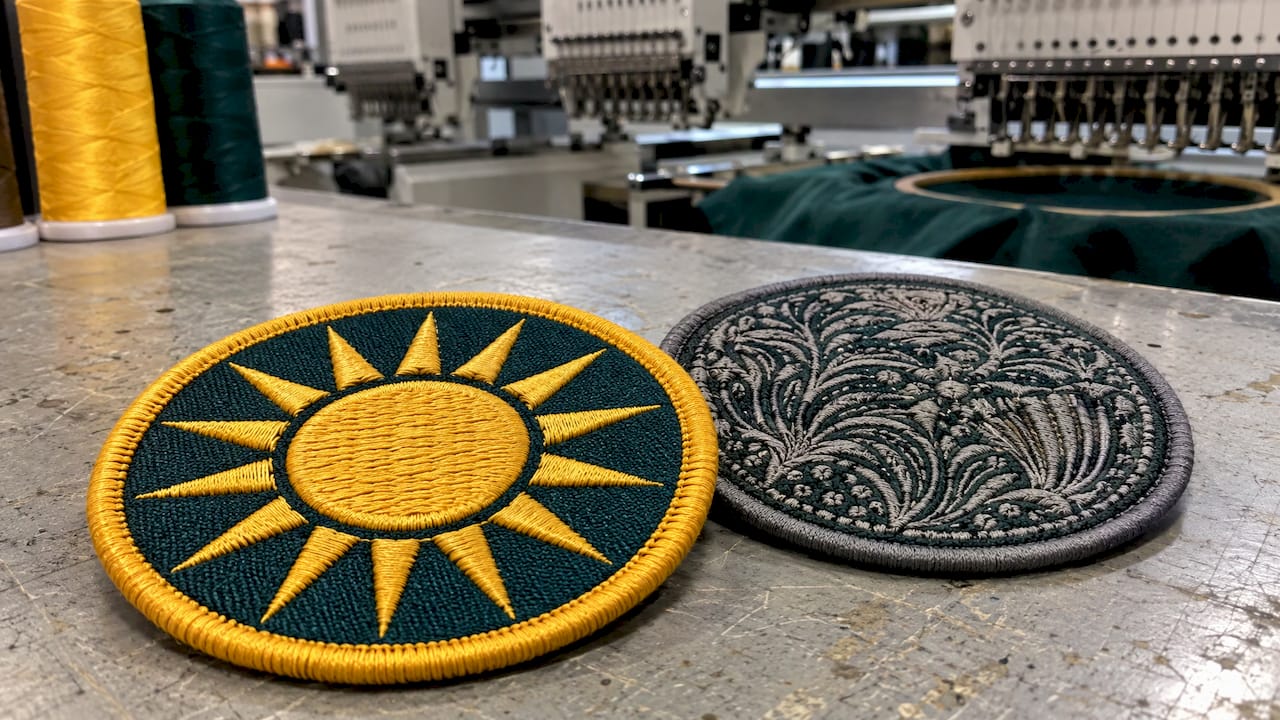
Artwork that looks sharp on a monitor can turn muddy once it is stitched. Thread has thickness, so a patch rewards the same instincts as a good road sign: clear at a glance, from a few feet away.
Keep the concept to one idea
Pick one focal element: a logo mark, a mascot, a skyline, a date emblem. Add the event name and, if needed, the year. Resist the urge to add taglines, sponsor lists and background scenes. If a sponsor must appear, give them their own small patch or a clean spot on the border.
Limit colors and use contrast
Fewer colors usually means a cleaner patch and an easier production run. Place light thread against dark thread, and avoid putting two similar mid-tones side by side, because they blur together at a distance. Gradients, which look lovely in print, are a poor fit for standard stitching. If your concept depends on shading or a photographic look, a printed patch is the better format.
Make text bigger than you think
Lettering is where most patch designs go wrong. Thin serifs, condensed fonts and long taglines fill in with thread and lose their shape. Use bold, open letterforms, give each letter room to breathe, and keep the wording short: event name, city or year, and little else. Always view your design at the real patch size on screen, or print it at actual size and hold it at arm’s length.
Respect minimum line widths
Very thin lines, tiny gaps and small dots will not hold in embroidery. Thicken outlines, merge details that sit almost touching, and drop elements that only work at large scale. Our team simplifies artwork like this every day, and a free proof lets you see what changes before anything is stitched. Read more about how the proof step prevents rework in our guide to logo patch design and free proofs.
Choose the material that suits the event
The style of patch changes how your design looks and how long it lasts. Here is how the main options match common event needs.
| Patch type | Look and feel | Best for events like |
|---|---|---|
| Embroidered | Classic stitched texture, vibrant thread colors | Conferences, clubs, volunteer crews, anniversary events |
| Chenille | Soft, plush, varsity style | School and sports events, reunions, team days |
| PVC rubber | Raised, flexible, water-friendly | Outdoor festivals, runs, rides, security and staff gear |
| Woven | Flat, tight weave with fine detail | Designs with small text or intricate artwork |
| Printed | Full-color artwork, gradients, photographic detail | Illustrated posters, portraits, many-color artwork |
| Leather | Premium, rugged, debossed or stitched | VIP gifts, brand activations, hat and bag patches |
If you are torn between the two most common choices for team events, our comparison of chenille versus embroidered patches lays out the trade-offs. For a broader overview of every format, start with the ultimate guide to custom patches.
Think about how the patch will live
A patch handed to attendees at a trade show might get tucked in a drawer. A patch sewn on a volunteer jacket will be worn, rained on and washed. Match the material to that reality. Outdoor and active events lean toward PVC or sturdy embroidered patches with a secure backing. Keepsakes and collectibles can lean toward detail and style. Our notes on PVC patch durability and on washing patches on uniforms explain how attachment and care affect lifespan.
Choose size, shape, border and backing together
These four decisions affect each other, so settle them as a set.
Size
Size should follow placement. A chest or sleeve badge reads well at a modest size, a jacket back needs far more, and a cap front is limited by the crown. Bigger patches allow more detail, but they also cost more and can feel heavy on light fabric. If text is the main feature, size up before you shrink the lettering.
Shape
Circles, rectangles and shields are the easy classics. A custom die-cut shape that follows your logo outline looks distinctive, but sharp points and narrow inlets are harder to finish cleanly. When in doubt, soften the corners.
Border
The edge is part of the design. Available options include merrowed, embroidered and laser-cut borders. A merrowed border gives a traditional rolled edge, an embroidered border can look neater on small or detailed patches, and a laser-cut edge suits intricate shapes. If edges are a worry for heavily worn patches, see our guide to fixing fraying patch edges.
Backing
Backing decides how the patch attaches, and therefore who can use it:
- Sew-on: the most permanent option, ideal for uniforms and team gear.
- Iron-on: quick for attendees and customers to apply at home; test it on the actual fabric first. Our heat press settings guide explains why testing on scrap matters.
- Peel-and-stick: convenient for temporary or giveaway use.
- Velcro: lets people swap patches between garments, handy for rotating roles or collectible displays. See our notes on Velcro patch strength.
If the patch is going on a garment, it is also worth asking whether a patch or direct embroidery is the better route. We cover that in patches vs direct embroidery, and the cap version in hat patches vs embroidery.
Prepare the files your manufacturer needs
You do not need to be a designer to order a patch, but clean files save time.
- Best: vector artwork (such as AI, EPS, SVG or a vector PDF), which can be scaled without losing sharpness.
- Acceptable: a high-resolution PNG or JPG. A small screenshot of a logo is the most common cause of delays and soft-looking results.
- Always include: the real patch size, the thread or Pantone colors you want matched, any text exactly as it should read, and the number of patches.
- Helpful extras: where the patch will be placed, the fabric it will go on, and a mood board or photo of the event’s other branding.
Don’t have a finished file? Send what you have. Our team can turn a sketch or a rough logo into a production-ready design, and you can review a proof and request a sample before committing to a full order.
If you also plan to put your event artwork directly on garments, embroidery digitizing converts a design into stitch-ready files. Our published prices are $10 for a left chest design, $10 for a cap design and from $30 for a jacket back, all one-off. Details are on the embroidery digitizing page.
Plan quantity, complexity and timing
Three things shape how smoothly an event order goes.
Quantity. Count everyone who should receive a patch, then add a buffer for late registrations, staff, sponsors and spares. It is cheaper and easier to order enough the first time than to reorder after the event. Larger quantities generally spread setup effort across more pieces, and we handle bulk orders for event organizers.
Complexity. More colors, finer detail, special borders and unusual shapes all add production effort. If the budget is tight, simplify the design before you shrink the quantity. A bold, two- or three-color patch often looks better in the crowd than a crowded one.
Timing. Work backward from the date you need the patches in hand. Leave room for artwork approval, a sample or proof, production and shipping, plus a cushion for revisions. Rapid quote turnaround helps at the start, but the approval stage is where schedules usually slip, so settle decisions quickly and have one person sign off. Ask for current production times when you request your quote, since they vary with design and order size.
A pre-order checklist
Before you request your quote, run through this list:
- Does the design make sense in one glance at arm’s length?
- Is every word spelled correctly and short enough to read?
- Are colors limited, high contrast and consistent with your brand?
- Does the material fit how and where the patch will be worn?
- Are the size, border and backing chosen for the garment or bag?
- Do you have the best artwork file you can send?
- Is the quantity confirmed with a buffer, and is the deadline realistic?
- Have you seen a proof or sample?
Carry the design beyond the patch
The strongest events feel like one coherent experience. When the patch matches the signage, the name badges and the printed materials, attendees recognize the brand wherever they look. If you are planning those other pieces too, this guide to event badge printing is a helpful reference for planning the badge side of the same visual identity.
Our perspective
Most patch problems we see are not production problems. They start with a design that tried to do too much in too little space. The best event patches we make begin with a clear purpose, a simple mark and a short line of text.
That is why we put so much weight on the steps before the order: a quick quote, a proof of your artwork and a complimentary sample. Seeing the real thing in your hand, in the real colors and the real size, is the surest way to catch a weak spot before you commit to a bulk run.
We build patches to last, with quality materials, vibrant thread colors and careful finishing, whether you need embroidered, chenille, PVC, woven, printed or leather. Your event only happens once, and the patch is the part people keep. We want it to look like a small piece of art.
Bilal
Ready to see your design as a patch?
Tell us what the event is, how many people will wear or receive the patch, and send us your logo or sketch. We will come back with a rapid quote, and you can ask for a complimentary sample so you can judge the color, texture and size before you order. Custom patches start from $99, and shipping is free. Start on our custom patches page or request your quote from the Lee Embroidery home page.

If you want more ideas first, browse our embroidery tips and patch design blog.
FAQ
How many colors should an event patch have?
Fewer is usually better. Two to four well-contrasted colors tend to read cleanly at a distance and keep production simpler. If your artwork needs many colors or gradients, ask about a printed patch, which handles that kind of detail.
What is the best patch type for an outdoor event?
PVC rubber patches are a strong choice for rain, mud and rough handling, and sturdy embroidered patches with a sew-on backing also hold up well. Choose the backing for how the patch will be attached and cared for, since that affects lifespan as much as the material.
Can I order a patch if I only have a rough sketch?
Yes. Send the sketch or your existing logo along with the size and colors you want, and we can prepare it for production. You can review a proof and ask for a complimentary sample before the full order goes ahead.
How far ahead should I order event patches?
As early as your design is settled. Allow time for quote, proof approval, sample review, production and shipping, plus a cushion for changes. Ask for current timing when you request your quote.