Choose direct embroidery when the logo is simple, the fabric is stable and you want the design to become part of the garment. Choose a patch when the design is detailed, the fabric is thick, stretchy or awkward to hoop, or you want to be able to replace the emblem later. Most buying decisions come down to those two sentences. The rest of this guide shows you how to apply them to your own order.
We make custom patches every day, and we also digitize artwork for direct embroidery, so we have no reason to push you toward the wrong method. Below you will find a side-by-side comparison, a decision guide by garment type, a section on infant apparel, and the questions to settle before you request a quote.
TL;DR
- Direct embroidery suits clean, bold logos on stable fabric. The stitching is part of the garment, so there is nothing to peel, lift or fall off.
- Patches suit fine detail, textured or thick fabrics, larger designs, and any item where you may want to swap or replace the emblem later.
- Attachment decides durability. Sew-on emblems generally last the life of a garment, while heat-seal and iron-on backings have wash limits.
- On baby clothes, anything that could come loose is a safety question first and a style question second.
- Direct embroidery starts with digitizing. We publish our digitizing prices: $10 for a left chest or cap design, and from $30 for a jacket back.
Table of Contents
- What is the difference between a patch and direct embroidery?
- Patches vs direct embroidery at a glance
- Design detail, size and shape
- Fabric and garment type
- Cost: where each method saves money
- Durability and care
- Look and brand feel
- When a patch is the better choice
- When direct embroidery is the better choice
- Can you do both?
- Turning an embroidery design into a patch
- Special case: infant and baby clothing
- What to settle before you order
- Perspective: why we don’t treat this as patch versus stitch
- Get a quote for your project
- FAQ
- Sources
What is the difference between a patch and direct embroidery?
Direct embroidery means the machine stitches the design straight into the garment. The shirt, cap or jacket is hooped, the thread goes through the fabric itself, and the finished logo cannot be separated from the item.
A patch is made separately. The design is stitched, woven, printed, molded or cut on its own base, finished with an edge, given a backing, and then attached to the garment. The attachment can be sew-on, iron-on, peel-and-stick or Velcro, and we offer all four. The border can be merrowed, embroidered or laser cut, depending on the patch type.
That single difference, whether the artwork is built on the garment or built beside it, explains almost every trade-off that follows: detail, size, placement, cost, repair and care.
Patches vs direct embroidery at a glance
| Factor | Direct embroidery | Patch |
|---|---|---|
| Where the design is made | On the garment | On its own base, then attached |
| Fine detail and tiny text | Limited by thread and fabric stretch | Better control, especially with woven or printed patches |
| Large designs | Can strain the fabric and pucker | Easier to size and keep flat |
| Thick, textured or stretchy fabric | Can sink in or distort | Usually a safer choice |
| Replacing a worn logo | Difficult without damaging the garment | Remove and replace |
| Look and feel | Flat, integrated, understated | Raised, framed, a distinct emblem |
| Attachment risk | None, it is stitched in | Depends on sew-on, iron-on or other backing |
| Material options | Thread on fabric | Embroidered, woven, chenille, PVC, leather, printed |
Use the table as a starting point, then read the sections below for the reasoning behind each row.
Design detail, size and shape
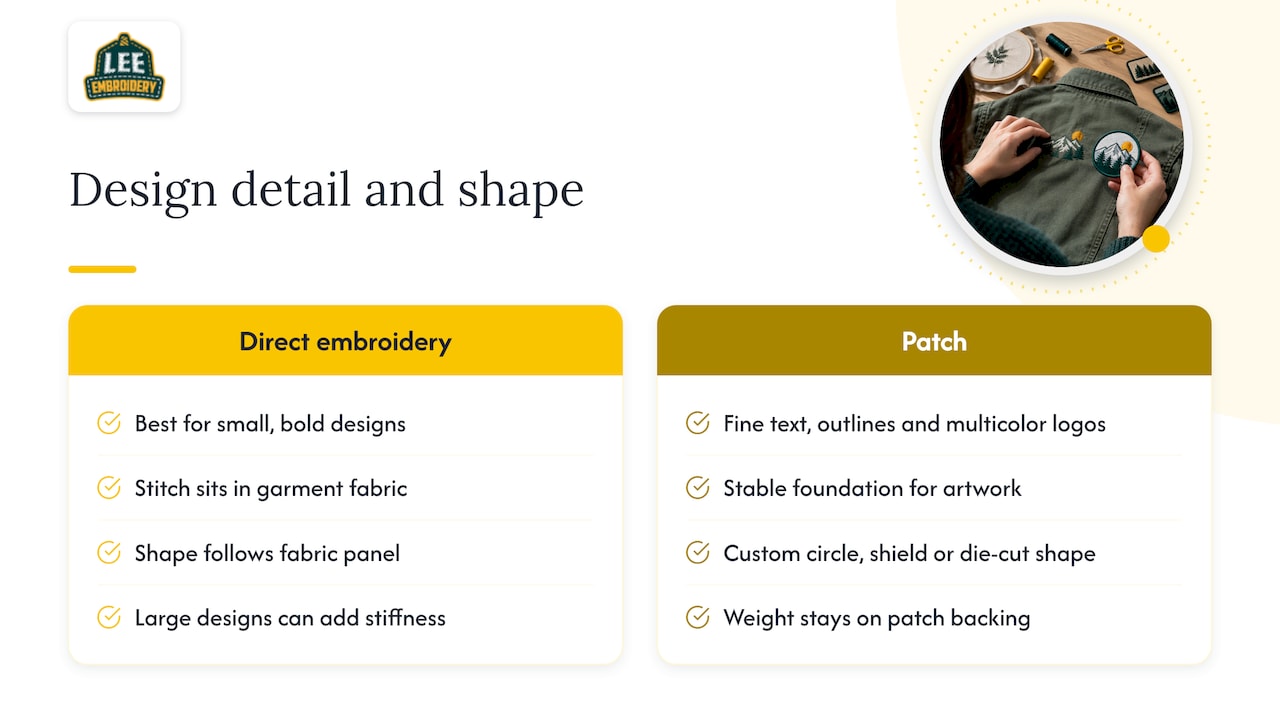
Thread is a coarse medium. Every stitch has width, so very small lettering and thin lines fill in or blur, and the finer the detail, the more the garment fabric works against you. A stretchy knit moves under the needle. A towel-like surface swallows the stitches.
A patch gives you a stable foundation for the artwork. That is why small text, tight outlines and multi-color logos often move to patches. If your artwork is very fine, a woven patch is worth a look, and our guide to what fine threads can and can’t show explains the limits honestly. For photo-like color work, a printed patch can hold gradients that thread cannot.
Shape is the other advantage. Direct embroidery is always attached to a rectangle or panel of fabric, and the logo’s silhouette is whatever you can stitch. A patch can be any custom shape: a circle, a shield, a die-cut outline of a mascot. If the contour of the logo is the brand, a patch protects it.
Size matters too. A big stitched design on a shirt adds stiffness and can pull the fabric, while a patch keeps the weight on its own backing. On the flip side, small and bold designs, a name, a monogram or a simple icon, are exactly what direct embroidery does best.
Fabric and garment type
Fabric often settles the question before design does.
- Polos, tees and knits: Direct embroidery works well for left-chest logos with moderate stitch counts. Heavy fills can pucker lightweight knits, so the choice depends on how dense the artwork is.
- Jackets and workwear: Both work. Direct embroidery looks cleaner on a jacket back if the logo is bold. A patch is better when crews change or when logos are updated.
- Caps and beanies: This is where patches shine. Thicker patches often give a higher-quality result on textured fabrics such as caps and sherpa. Our guide to hat patches vs embroidery goes deeper, and if you are leaning toward leather on knit headwear, read the 2-inch beanie leather patch specs first.
- Bags, backpacks and hard-to-hoop items: A patch avoids hooping altogether, since you can attach it afterward with stitching or Velcro.
- Sherpa, fleece and plush: Direct stitching tends to sink into the pile. A patch sits on top of it.
If you are choosing between patch constructions for apparel, our comparison of woven vs embroidered for different fabrics will help you narrow it down.
Cost: where each method saves money
The honest answer is that it depends on quantity, stitch count and what you already own.
Direct embroidery needs a digitized file, which is a one-time job, and then the run itself. Digitizing is the step that turns your artwork into a stitch file the machine can read. We charge $10 for a left chest design, $10 for a cap design, and from $30 for a jacket back, all one-off. Once the file exists, you can reuse it on every future order of that logo at that placement.
A patch costs more per piece to make, because it is a manufactured product in its own right. Our custom patches start from $99, and the final price depends on type, size, quantity and backing. The patch pays you back in other ways:
- You can make the patches once and apply them to garments as needed, which helps when you have mixed sizes or stock that changes.
- Sewing a patch to a garment is often easier and faster on awkward items than hooping and stitching them.
- If a logo changes, you replace the patch instead of replacing the garment.
A practical rule: for a large run of identical polos with a simple chest logo, direct embroidery is usually the efficient choice. For a mixed program of jackets, caps, bags and uniforms that all need the same emblem, one patch order is often simpler to manage. If you are not sure which side of that line you are on, request a quote for both and compare.
The same logic applies to any branded-goods program: a decision made before production is cheaper than a correction after it, and avoiding costly branding rework is a lesson that holds from fleets to uniforms.
Durability and care
Both methods can last for years. What differs is how they fail.
Direct embroidery fails slowly: threads can snag, fade or wear with the garment itself. Because the stitching is in the fabric, it ages with the garment.
Patches fail at the attachment. According to a trade report, sew-on emblems generally last the life of a garment, industrial heat-seal adhesives can withstand up to 50 commercial washings, and low-melt adhesive patches typically hold up to 25 home-machine washings. The same source says bleaching a heat-sealed patch is not recommended.
So the practical ranking for permanence is simple:
- Sew-on: the most permanent patch attachment.
- Heat-seal or iron-on: convenient and quick, with a wash limit. Our iron-on patch instructions cover timing and care labels.
- Velcro and peel-and-stick: for removable or temporary use. We cover the numbers in our piece on Velcro patch strength.
If you use heat, test first. The same report advises testing heat-seal adhesives before production to confirm your settings, and our heat press settings guide walks you through testing on scrap.
Material matters as well. PVC patches handle water and outdoor wear differently than thread does, and we explain how attachment and care shape their lifespan in our PVC patch durability guide. For uniforms that go through frequent laundering, match the backing to the wash routine, as covered in our patch washing instructions. If edges are your worry, here are fixes for fraying patch edges.
Look and brand feel
Direct embroidery reads as quiet and integrated. A patch reads as an object: it has an edge, a border and often a raised surface. Neither is better. They send different signals.
One trade publication reports that the premium apparel market is shifting toward subtle branding and elevated decoration techniques. In practice, that means two things. Small, tone-on-tone direct embroidery is one answer. A refined patch, such as leather, is the other. If you want that elevated look, our leather patches are made for it. For a bolder, varsity-style look, chenille patches add texture that flat stitching cannot.
If your brand is playful, streetwear-inspired or team-based, patches also give you more freedom. Our streetwear patch ideas and event patch ideas show how far that can go.
When a patch is the better choice
Pick a patch when:
- The logo has fine detail, small text or many colors.
- The garment is thick, textured, stretchy, or hard to hoop.
- You need one emblem across different garment types and sizes.
- Logos change often: seasonal teams, events, staff rotations.
- You want the item to read as branded merchandise, with a raised, framed look.
- You want to be able to move the emblem to a new jacket or bag.
When direct embroidery is the better choice
Pick direct embroidery when:
- The design is bold and simple, with limited small text.
- The fabric is stable and takes stitches cleanly, like a structured polo or twill.
- You want nothing to catch, peel or lift.
- You want a low-profile, premium look.
- The same logo will be repeated on a large run of identical garments.
- The item will be washed heavily and you do not want to depend on an adhesive.
Can you do both?
Yes, and many programs do. A common setup is direct embroidery for the left chest logo and a patch on the sleeve or back. Another is a simple stitched wordmark on the front of a cap and a leather patch on the side. Mixing methods lets each one do what it is best at. Our ultimate guide to custom patches covers types, borders and backings if you are planning a mixed program.
Turning an embroidery design into a patch
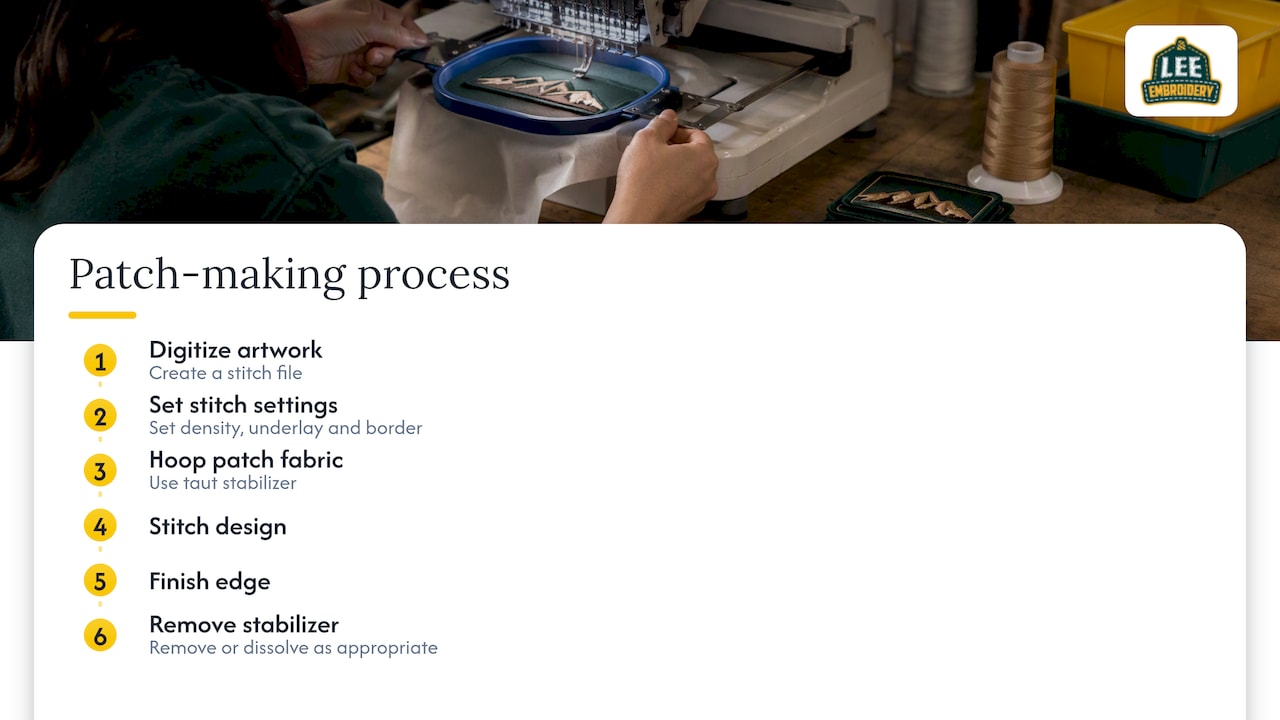
A common question is how a design becomes a patch. In outline, the process is: digitize the artwork into a stitch file, set stitch density, underlay and border, hoop the patch fabric with taut stabilizer, stitch the design, then finish the edge and remove or dissolve the stabilizer as appropriate, as one patch-making guide describes. The exact workflow varies by patch type and equipment.
The good news is that digitizing is shared. A well-prepared file can often be used for direct embroidery, and the same artwork can then be adapted for a patch. If you already have a file, tell us when you request a quote.
Special case: infant and baby clothing
Baby apparel is where the patch-or-stitch decision carries a safety dimension. Whether you run a boutique, an online shop with name-embroidered onesies, a photography studio selling outfit add-ons, or a hospital gift program, the same principle applies: anything attached to infant clothing must stay attached.
The U.S. Consumer Product Safety Commission has recalled children’s coveralls because a bunny appliqué could detach and create a choking hazard for young children. That is a reason to treat attached decoration on infant wear with extra care.
Here is how we would think about it:
- Direct embroidery is usually the simpler path for infants. Names, birth dates and small motifs stitched into the fabric leave no separate piece that can come off. Keep the design flat and soft, and ask whether the backside will touch skin.
- If you use a patch, choose sew-on. Avoid relying on adhesive alone for anything a baby can reach, mouth or pull at.
- Skip hard, raised or detachable elements on items for the youngest wearers, such as PVC or thick leather, unless the product is designed and tested for that age group.
- Test before you scale. Pull on the finished piece, wash it several times, and check the edges and stitching. If you sell children’s products, confirm the requirements that apply to your items with the CPSC or a qualified testing professional.
For baby brands, monogram shops and subscription boxes, this is also an argument for consistent digitized designs: one reliable file across a product line gives you repeatable, tested results.
What to settle before you order
Whichever way you lean, a few decisions will save you rework:
- Artwork: Is it vector or a clear high-resolution file? Is any text smaller than the thread can hold?
- Garment: What fabric and where will the design sit? Hat, jacket back and left chest all behave differently.
- Quantity and variety: One garment type or many?
- Wash routine: Home laundry, commercial laundry, or rarely washed?
- Lifespan of the logo: Permanent identity, or something that may change next season?
- Wearer: Adult, child or infant?
Then test. We offer complimentary samples so you can see a patch in your hand, on your fabric, before you commit to a bulk run. That is the cheapest way to avoid a surprise.
Perspective: why we don’t treat this as patch versus stitch
We sell patches, so you might expect us to say patches win. We don’t think they do. The method that wins is the one that matches your artwork and your garment. We have seen simple logos look perfect as direct embroidery and detailed logos fall apart when forced into thread on stretchy fabric. We have also seen teams order patches when a clean stitched logo would have cost less and looked sharper.
Our advice is to decide on the garment first, the artwork second and the budget third. If the fabric is thick, stretchy or textured, lean toward a patch. If the design is simple and the fabric is stable, lean toward direct embroidery. When you cannot tell, ask for a sample. A sample that costs you a few minutes of looking saves a full production run of regret.
— Bilal
Get a quote for your project
If direct embroidery is the right fit, our embroidery digitizing service prepares your logo for left chest, cap or jacket back placements, with published prices of $10, $10 and from $30. If a patch fits better, you can explore embroidered patches, woven patches or PVC rubber patches, or start from our custom patches page, where orders start from $99. Tell us what you are decorating and we will give you a fast quote, free shipping and a complimentary sample to check before you commit.
FAQ
Are patches cheaper than direct embroidery?
Not necessarily. Direct embroidery usually needs a one-time digitizing fee and then a run cost, while patches are manufactured separately and carry their own production cost. Patches can save money when you need one emblem across many garment types, or when you want to replace logos without replacing garments.
Do iron-on patches actually stay on?
They can, within limits. One trade report says industrial heat-seal adhesives withstand up to 50 commercial washings and low-melt adhesive patches typically hold up to 25 home washings. For anything washed constantly, adding stitching around the edge is the safer route.
Which is better for hats, patches or embroidery?
It depends on the cap’s fabric and your logo. Simple logos on structured caps stitch well directly. Thick or textured caps, small detail and larger designs often work better with a patch. Our hat patches vs embroidery guide compares both.
Can I use the same artwork for both?
Usually yes, but not always as is. Digitizing prepares your artwork for stitching, and it may need adjustments for stitch density, border and size depending on whether it becomes a direct embroidery file or a patch. Send us your artwork and tell us the garment so we can advise.
Is direct embroidery safer on baby clothes?
It is generally the simpler option, because nothing separate can detach. A patch can still be used if it is firmly sewn on and tested for the age group. Any child’s product should be checked against current CPSC requirements.
Sources
- Which Emblem Tech is Best? | Impressions
- Fact vs. Fiction: Debunking 5 Decorated Apparel Myths
- Stahls’ Launches Line of Debossed Leather Patches
- The Ultimate Guide to Professional Embroidery Patch Making
- Weeplay Kids Recalls Children’s Coveralls Due to Choking Hazard (CPSC)