Newborn photo embroidery means two things, and both are worth doing well. The first is stitching a baby’s portrait, footprint or birth details into a keepsake. The second is embroidering outfits, wraps, bibs and props for a newborn session. Either way, the job comes down to three things: a simple, high-contrast design, soft construction against the skin, and nothing on the garment that can come loose. This guide shows you how to get all three, whether you run a studio, a boutique or an online baby shop.
TL;DR
- Simplify the photo before you stitch it. High-contrast images with quiet backgrounds stitch cleanly. Busy ones turn muddy and stiff.
- Embroider directly into the garment where you can, and cover the back of the stitching with a soft layer. Skip stiff, thick patches on anything a newborn wears.
- Keep loose parts off baby garments. No beads, buttons or detachable appliqués, and nothing near necklines, ties or closures.
- Infant clothing sold in the US still needs a fiber content label, and children’s products for under 3 are subject to the small parts rules.
- Test one sample before every run. A free sample and a proper digitized file prevent most reprints.
Table of Contents
- Two kinds of newborn photo embroidery
- Start with the right photo
- Comfort first: how to stitch on newborn clothing
- Patches on newborn gear: when they work and when they don’t
- Safety and legal checks before you sell
- Preparing files for production
- What it costs to digitize
- Our perspective
- Ready to order? Start with a sample
- FAQ
- Sources
Two kinds of newborn photo embroidery
It helps to separate the two, because the production rules differ.
Photo stitch keepsakes. A photograph is converted into thread. Think of a framed hoop with a sleeping baby, a footprint with the birth date, or a portrait on a blanket corner. Photo stitch converts the image into layered color passes. Professional guidance warns that the layers run from lightest to darkest. If you skip a color change, you can’t get back to the correct sequence, and the piece is effectively ruined. That is why quality control at each layer matters.
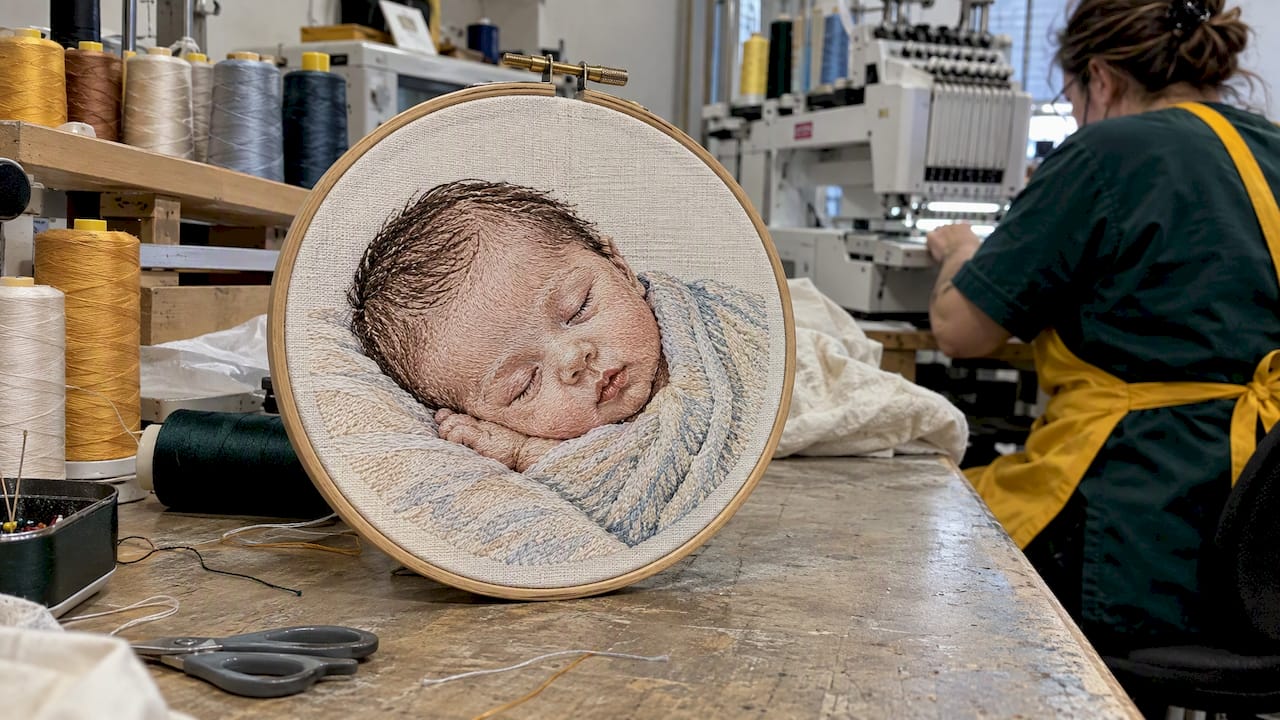
Session outfits and props. Here the embroidery is a name, monogram, date or small icon on a wrap, hat, bonnet, bib or onesie. The photographer or boutique sells it as an add-on. The design is usually simpler than a portrait, but the wearer is a newborn, so comfort and safety come first.
Many studios and baby brands do both: a stitched portrait as the keepsake and a matching monogrammed outfit as the prop. Planning them together keeps colors and lettering consistent across the set.
Start with the right photo
Embroidery can’t reproduce every pixel. Thread has thickness, so fine gradients and tiny details get lost. A guide on digitizing photos for embroidery compares the process to translating a language: the camera captures millions of pixels, and the machine speaks in stitches, angles and thread.
For newborn images, that translates into a short checklist:
- Choose high contrast. A baby’s face against a light blanket or a plain background reads well. Low-contrast shots with similar tones blur together in thread.
- Simplify the background. Remove props, patterned fabric and clutter. Sleeping-baby profiles, hands, feet and silhouettes are the strongest subjects.
- Crop tight. A small face on a large canvas loses its features. Crop so the subject fills the frame.
- Reduce the palette. Fewer colors mean fewer thread changes and cleaner results. Soft, natural newborn tones are easy to match.
- Avoid tiny text. Names and dates need enough height to stay legible. Our guide to making small text readable on patches gives the minimum sizes we work with.
One technical number worth knowing: the same guide on photo digitizing suggests a stitch density of roughly 0.4 mm to 0.45 mm for most infant fabrics. Dense, heavy fills make soft fabric stiff and can pucker it. It also says to trim jump stitches after every color change, since leftover ones create tangles and loops on the inside of the garment, exactly where a baby’s skin sits.
Comfort first: how to stitch on newborn clothing
Newborn skin is sensitive, and a garment that looks perfect in a photo can be miserable to wear. Commentary on why embroidery digitizing suits newborn wear argues that it is among the safest decoration methods because soft, permanent threads are stitched directly into the fabric, without the inks and adhesives used in some printing. Treat that as an industry opinion, not a guarantee. Your fabric, thread and finishing still decide the result.
A few practical rules that hold up:
- Stitch direct to the garment when possible. A safe-design guide for baby items says professionals avoid stiff patches on baby gear and choose direct embroidery.
- Cover the reverse side. The same source recommends a soft cover or iron-on tricot backing over the back of the stitching, so stitches don’t scratch delicate skin.
- Place designs away from where the baby lies. A chest or shoulder placement is gentler than a design under the back or neck.
- Test first. Run stabilizer, thread and needle on a scrap of the same fabric. Small changes in pull compensation or density can prevent puckering.
- Pick the right thread. Our embroidery thread types guide explains the 40wt top and 60 to 70wt bobbin setup we test in the workshop, which helps keep the underside light.
If your design is a monogram on a onesie, size matters too. We’ve written up safe monogram sizing for a 4×4 inch hoop, which helps you avoid a design too big for a tiny garment.
Patches on newborn gear: when they work and when they don’t
You’ll often get asked for a patch on a baby item: a small logo patch for a boutique brand, a name patch for a daycare outfit, a milestone badge. Patches can work, but only if you choose carefully.
| Situation | Better choice | Why |
|---|---|---|
| Newborn wrap, sleeper or bodysuit worn against skin | Direct embroidery with a soft backing | No stiff edge or rough reverse |
| Outer layer: jacket, cap, bag, blanket corner | Woven or embroidered patch | Flatter and lighter than thick materials |
| Brand label on a hat or accessory | Leather or woven patch, firmly attached | Sturdy, and clean-looking |
| Keepsake display piece, not worn | Any style, including chenille | No skin contact |
If you’re unsure between a flat woven style and a raised embroidered one for soft goods, our comparison of woven vs embroidered patches for apparel shows how each behaves on different fabrics. And if your shop sources patches for baby lines, read our guide on safe baby patch materials and the 100 ppm lead limit before you place an order.
Parents who want to add a patch themselves can follow our safe iron-on method for baby clothes, which takes about 15 to 20 seconds of heat.
A note on printed alternatives
Some sellers consider printing a photo instead of stitching it, especially on dark fabric, where a white base layer is needed. If you go that route, a technical guide on white underbase printing explains flash temperatures and fabric testing. Printed work still needs checking for how it feels on the skin. For anything a newborn wears, we lean toward stitching.
Safety and legal checks before you sell
This is the part sellers skip, and it’s the part that can cost the most. The points below summarize US federal guidance. Read the linked pages, and talk with a qualified product-safety or compliance professional if you manufacture or import baby garments.
Small parts. The CPSC’s small parts rules ban children’s products for under 3 years old from containing small parts that pose a choking, aspiration or ingestion hazard. A small part is anything that fits inside the standard cylinder, which approximates a young child’s fully expanded throat. So embellishments must stay put. Don’t add beads, buttons, loose 3D appliqués or detachable studs to baby apparel.
Infant garments and flammability. The CPSC explains in its infant garment FAQ that garments sized 9 months or smaller are treated differently from larger children’s sleepwear under the flammability rules. The length limits are 25.75 inches for one-piece items and 15.75 inches per piece for two-piece items. They still need to meet the general clothing flammability standard. If your product is a sleeper or sleep-themed set, check this page before you decide how it is classified.
Sleep-themed marketing counts. The CPSC also says it looks at the actual intended use, not just the label. An item marketed with sleep themes or shown beside sleepwear can be regulated as children’s sleepwear regardless of what you call it, as set out in its guidance on children’s outerwear drawstrings. That page also covers the hood and neck drawstring prohibition for children’s upper outerwear in sizes 2T to 12. Even on newborn pieces, stay away from cords and ties near the neck.
Labels. Apparel sold in the US must carry a permanent label with fiber content, country of origin and the identity of the manufacturer or another responsible business. That identity can be a Registered Identification Number. The FTC enforces this. Embroidery doesn’t replace it, so leave room on the garment for the label.
One more rule of thumb: keep any stitching away from necklines, straps and closures, where it can irritate or interfere with fastenings.
Preparing files for production
A good file is where quality starts. Photographers often send a JPEG and expect an embroidered result, but machines need a digitized file that tells them where each stitch goes.
What to send:
- The highest-resolution original, not a screenshot or a social post.
- The final size in inches and the placement (left chest, cap front, blanket corner).
- The garment fabric and color, so the digitizer can adjust density and underlay.
- The text exactly as it should read, including spelling of the baby’s name and the date format.
- Any thread colors you need matched. Our page on confirming embroidery color matching with a free sample explains how to avoid reprints.
If you want to understand the cost side first, see our guide to embroidery digitizing cost for small businesses, and for turning artwork into a stitch file read logo to embroidery.
What it costs to digitize
Our published digitizing prices are simple. Here is what you’d pay for common placements:
| Placement | Price |
|---|---|
| Left chest | $10 one-off |
| Cap | $10 one-off |
| Jacket back | from $30 one-off |
Custom patches start from $99. Because a one-time digitized file can be reused, a studio can use the same monogram or logo across wraps, hats and bibs without paying again for each item.
Our perspective
We make patches and digitize embroidery files for a living, and we treat baby work differently from anything else we do. A logo on a work jacket can be bold and dense. A design on a newborn outfit should be light, flat and quiet.
When a studio or boutique asks us for a newborn piece, we start with three questions. Will it touch skin? Could any part of it come off? Does the design need all the detail you’ve asked for? Nine times out of ten, simplifying the artwork makes the finished piece look better and feel better.
We also advise our customers to start with a sample. It costs little compared with a reprint, and it lets you hold the result, check the back of the stitching and see the colors against your fabric. Our samples are complimentary for exactly that reason. A newborn session happens once, and the keepsake should be right the first time.
Our patches suit outer layers, bags, hats and display keepsakes, where a clean, durable finish is what you want. For anything worn next to a baby’s skin, we’ll tell you plainly when direct embroidery is the better route.
— Bilal
Ready to order? Start with a sample
If you run a photography studio, baby boutique or online shop and want a consistent look across your pieces, we can help with the file and the finished product. Send us your artwork for a quick quote, ask for a free sample, and we’ll show you how it looks before you commit. Free shipping applies to orders, and bulk quantities are no problem.
- Need a stitch-ready file? See our embroidery digitizing service.
- Want a branded patch for packaging, hats or display pieces? Explore our custom patches, including embroidered, woven and leather options.
FAQ
Can any newborn photo be turned into embroidery?
Most can, but not all will look good. High-contrast photos with simple backgrounds and a tight crop work best. Busy, low-contrast shots usually need editing first, and fine detail will be simplified in thread.
Is embroidery safe for newborn skin?
It can be, when it is designed for it. Use soft thread, a gentle density, a soft cover over the back of the stitching and no loose parts. Because every baby and fabric is different, test a sample and check the reverse side before selling.
Should I use a patch or direct embroidery on a newborn outfit?
For pieces worn against the skin, direct embroidery with a soft backing is the safer choice, because stiff patches can scratch. Patches suit hats, jackets, bags and display items. If you do use one on baby clothes, make sure the materials meet baby-safety expectations and that it is firmly attached.
What legal rules apply to embroidered baby clothes in the US?
Children’s products for under 3 are covered by the CPSC’s small parts rules, and garments need a permanent fiber content label. Infant garments and sleepwear have their own flammability classification. Check the CPSC and FTC pages above, and consult a compliance professional if you manufacture or import.
How much does it cost to digitize a design for baby items?
Our digitizing starts at $10 one-off for a left chest or cap design, and from $30 one-off for a jacket back. Custom patches start from $99.
Sources
- Infant Garments and Tight-fitting Sleepwear Garments, CPSC
- Small Parts Ban and Choking Hazard Labeling, CPSC
- Drawstrings in Children’s Upper Outerwear, CPSC
- Federal Trade Commission
- Embroidery on Baby Items: Safe Designs Guide, SewFlow
- How to Digitize Photos for Embroidery, SewingTrip
- Why embroidery digitizing is the safest choice for newborn wear, FemTech World
- Photo stitch process guide (PDF), Voltex