Streetwear patches look best when they are tactile, retro and a little bold, and these motifs are the ones to try first: retro logo badges, band and music icons, nature scenes, oversized typography, chenille varsity letters and PVC cap emblems. Start with one statement piece, then build around it. Below you will find ideas, material picks, placement formulas and quick application tips.
TL;DR:
- Match material to use: embroidered patches suit logos and daily jackets, chenille works for large varsity letters and must be sewn, while PVC handles rain.
- For a clear layout, center a large patch between the shoulder blades, add a small chest emblem, and leave one patch width between pieces.
- Sewing lasts longest and works on nearly any fabric; iron on patches can lift from stretchy or textured cloth, while Velcro suits removable designs.
- Request a physical sample to check color and texture, since screens can misrepresent both; test washing on scrap fabric before applying the patch.
Table of Contents
- 1. Fourteen patch motifs that work on streetwear
- 2. Which patch material fits which look
- 3. Where to place patches on jackets, hats, backpacks and sleeves
- 4. Quick DIY application: sew, iron or stick
- 5. Inspiration sources and 2026 trend cues
- 6. A maker’s checklist for patch-ready art
- 7. Turn these ideas into finished patches with us
- FAQ
- Sources
1. Fourteen patch motifs that work on streetwear
Each idea below comes with placement and material suggestions, so you can act on it today. GQ’s jacket patch roundup points to retro vibes and DIY patch culture as the big influences, and the list leans into both.
- Retro logo badge: Place it on the left chest of a work jacket. Use embroidered patches in a size that suits the design.
- Fake heritage crest: Pick a made-up “est.” crest for the upper back of aged denim. Go with woven, sized to suit the design.
- Band or record icon: A cassette, vinyl disc or lightning bolt sits well on a bag flap or sleeve. Embroidered, sized to suit the design.
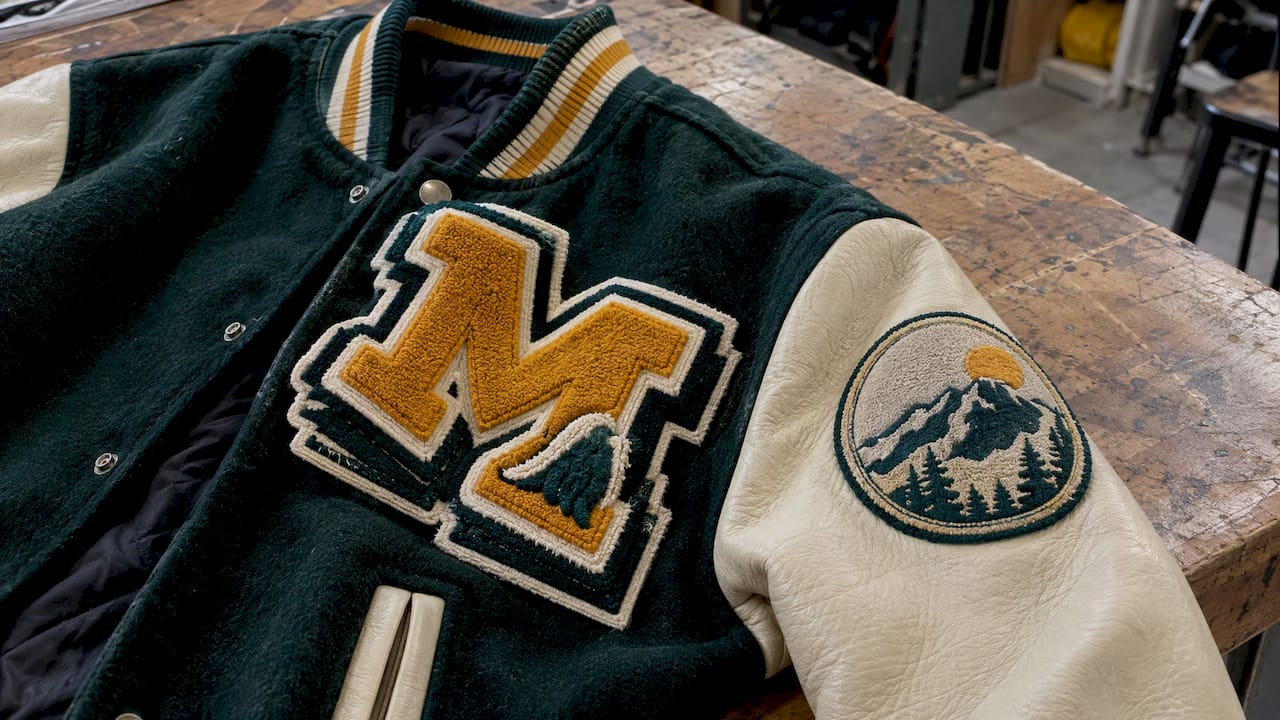
- Mountain and pine scene: Put it on a backpack front pocket or a canvas jacket. Embroidered with satin fill, sized to suit the design.
- Sun, moon or wave: Choose simple shapes for a cap side panel or sleeve. Woven or PVC, sized to suit the design.
- Bold block typography: A single word like “LOCAL” or “NO RULES” looks sharp on a hoodie sleeve or jacket back. Embroidered, sized to suit the design.
- Slogan strip: A long, thin quote patch fits a collar or bag strap. Woven, sized to suit the design.
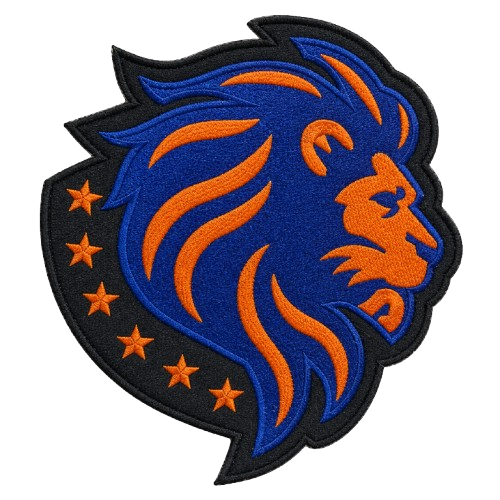
- Animal mascot: Think tiger, bulldog or KOI on the jacket back. Chenille or embroidered, sized to suit the design.
- Pet portrait: A stylized dog or cat on a denim pocket. Printed or embroidered, sized to suit the design.
- Varsity letter: A chenille initial on the left chest of a bomber. Chenille, sized to suit the design.
- Retro sports emblem: Use a pennant or crossed-bat shape on the sleeve. Chenille with embroidered border, sized to suit the design.
- Kitsch icons: Cherries, flames, smiley faces or dice work as small accents scattered on jeans. Any material, sized to suit the design.
- Geometric abstract: Checkerboard, stripes or a bold circle on a beanie cuff. Woven or leather patches, sized to suit the design.
- Collage cluster: Mix small patches in different textures on one panel. Mixed materials, sized to suit the design.
Aged denim, varsity wool and canvas give these motifs the most contrast. Save PVC for caps and gear that see rain.
2. Which patch material fits which look
The material decides how a motif feels in the hand and how it holds up. Here is how each one behaves.
- Embroidered: Thread-built texture with crisp detail. It suits logos, lettering and most everyday jackets. Sew-on or iron-on backing both work.
- Chenille: Plush, looped and very varsity. It belongs on bomber jackets and sweatshirts, where it can be large. Sew it on, because the pile can melt under direct iron heat.
- PVC: Rubbery, glossy and waterproof, with raised edges. It excels on caps, bags and outdoor gear. Velcro or sew-on backing keeps it flexible and secure.
- Woven: Fine thread gives sharp small text and tight graphics. Use it for slogans and small icons. Iron-on or sew-on works well.
- Leather: Warm, debossed and a bit premium. It pairs with beanies, hats and denim. Sew-on or adhesive backing is the usual match, and we cover why in our patch backing guide.
For scale, make sure embroidered designs are large enough to preserve fine details, and go bigger for chenille so the pile can show shape.
3. Where to place patches on jackets, hats, backpacks and sleeves
Back panels read as statements, chest spots read as signatures, and sleeves read as personality. Hats and bags are the easy place to experiment.
Try these layouts:
- Back centerpiece plus chest emblem: Center one large patch between the shoulder blades, then add a small matching mark on the left chest.
- Asymmetrical sleeve cluster: Group patches of different sizes on one upper sleeve, leaving the other bare.
- Cap trio: Line up small patches across the front panel, with the middle one slightly larger.
For legibility, pair light thread on dark fabric or the reverse, and avoid placing similar colors side by side. Leave a patch-width of breathing room between pieces.
4. Quick DIY application: sew, iron or stick
Gather a needle, polyester thread, fusible backing, an iron or heat press, fabric glue and Velcro strips. Sewing lasts longest and works on nearly any fabric. Iron-on is fast but can lift on stretchy or textured cloth, and adhesive or Velcro suits caps, bags and patches you want to swap.
These finishing habits can help avoid headaches:
- Stabilize thin fabric with an inner backing before sewing.
- Reinforce edges with a few extra stitches at the corners.
- Test washing on a scrap swatch first.
- Order a sample before committing to a run.
Pro Tip: Pin or tape the patch in place and check it in a mirror before any heat or thread touches the fabric.
5. Inspiration sources and 2026 trend cues
The look is tactile: mixed stitch types, retro and ironic kitsch, and layered collage. Build a moodboard from vintage varsity jackets, scanned band merch, archive patch collections, Pinterest boards and niche collector forums. Then mix materials, such as chenille letters beside a woven slogan, so the piece reads from across the street and rewards a closer look.
6. A maker’s checklist for patch-ready art
Before any idea becomes a patch, I check scale, contrast and texture. Shrink the art to the size you will actually wear it and see whether the shapes still read. Then make a paper or felt mockup and pin it on the garment. If color or feel matters, get a physical sample, because screens flatter everything.
— Bilal
7. Turn these ideas into finished patches with us
If you would rather skip the DIY, we make embroidered, chenille, PVC, woven and leather patches in your shape and backing. Our quotes come back quickly, and complimentary samples let you check color and texture first. Request a quote or sample for your custom patches and bring your streetwear sketch.

FAQ
What are the best patches for jackets?
Embroidered and chenille patches are the safest picks for jackets because they add texture and hold their shape. GQ highlights chenille and appliqué as current inspiration, especially on denim, varsity and leather. Choose chenille for big letters and embroidered for logos.
How do I attach a patch without sewing?
Use iron-on backing, fabric glue or Velcro. Iron-on works best on flat cotton or denim, while Velcro suits caps and bags. Sewing is still the longest-lasting option on stretchy fabric.
Can I make my own streetwear patches?
Yes. Sketch the motif, cut felt or twill for a mockup, and add stitched details by hand to test the look. For clean edges and consistent color across several pieces, order a sample from a patch maker first.
What patch size works best on a jacket back?
Choose a size that reads clearly from a distance. Go larger for chenille and simple shapes, and smaller for fine text. Keep the patch centered between the shoulder blades.