For most infant onesies, a modestly sized monogram works best, centered or placed on the left chest with roughly two finger-widths of clearance from the neckline. Keep CPSC recall history in mind, since loose decorations have caused choking hazards, and remember that a 4×4 inch embroidery hoop limits the size and detail of designs you can stitch in one pass.
TL;DR:
- Starting at 3M can extend wear time: Carter’s guidance places that size at roughly 9 to 12.5 pounds and 21.5 to 24 inches.
- Place the design above the snap line and check the actual garment flat; a paper template can reveal crowding before stitching becomes permanent.
- Choose sewn embroidery or a securely attached embroidered patch, avoid beads, sequins, and hard plastic, and use soft backing against delicate skin.
- A 4 by 4 inch hoop limits design size, while a 5 by 7 inch hoop allows more detail; tiny lettering can blur or stiffen fabric.
- Request a sample and confirm scale and color before placing a full order, since a screen preview cannot show how embroidery sits on the garment.
Table of Contents
- Recommended Monogram Sizes by Baby Clothing Size
- Placement and Visual Balance: Center Chest vs Left Chest
- Safety and Attachment: What Recalls Show and How to Attach Safely
- Hoop Sizes, Stitch Choices, and Method Selection
- Measuring and a Quick Test-Fit Process Before Committing
- Three Rules I Use When Personalizing Onesies
- How We Help You Get a Safe, Properly Sized Monogram
- FAQ
- Sources
Recommended Monogram Sizes by Baby Clothing Size
Sizing a monogram isn’t just about looks. The garment size, the baby’s growth curve, and the hoop you’re stitching in all set real limits on what will look right and hold up.
- Newborn (NB): Keep monograms small, since fabric real estate is tight and babies often outgrow this size quickly.
- 0-3M / 3M: This is the sweet spot for personalization. A modest monogram can read clearly without crowding the chest panel.
- 3-6M: Go slightly larger, since there’s more chest width to work with and the garment will be worn longer.
- 6-12M: Monograms look proportional and stay legible as the onesie’s overall dimensions grow.
Many parents skip newborn sizing altogether for personalized pieces. Carter’s size guidance puts newborn sizing around 6 to 9 pounds, while 3M covers roughly 9 to 12.5 pounds and 21.5 to 24 inches, a range many babies may reach as they grow. Healthychildren echoes this, recommending larger sizes over newborn because infants commonly outgrow newborn clothing fast. Starting at 3M gives a monogrammed onesie a longer wear window.
Hoop size also sets a practical floor. A standard 4×4 inch hoop limits how large a design can be stitched in one pass, which is part of why many baby monograms are kept modest in size. Pushing a monogram too small to fit a tight space usually backfires, since tiny lettering gets harder to read and the stitch count needed to hold its shape can stiffen delicate onesie fabric.
Placement and Visual Balance: Center Chest vs Left Chest
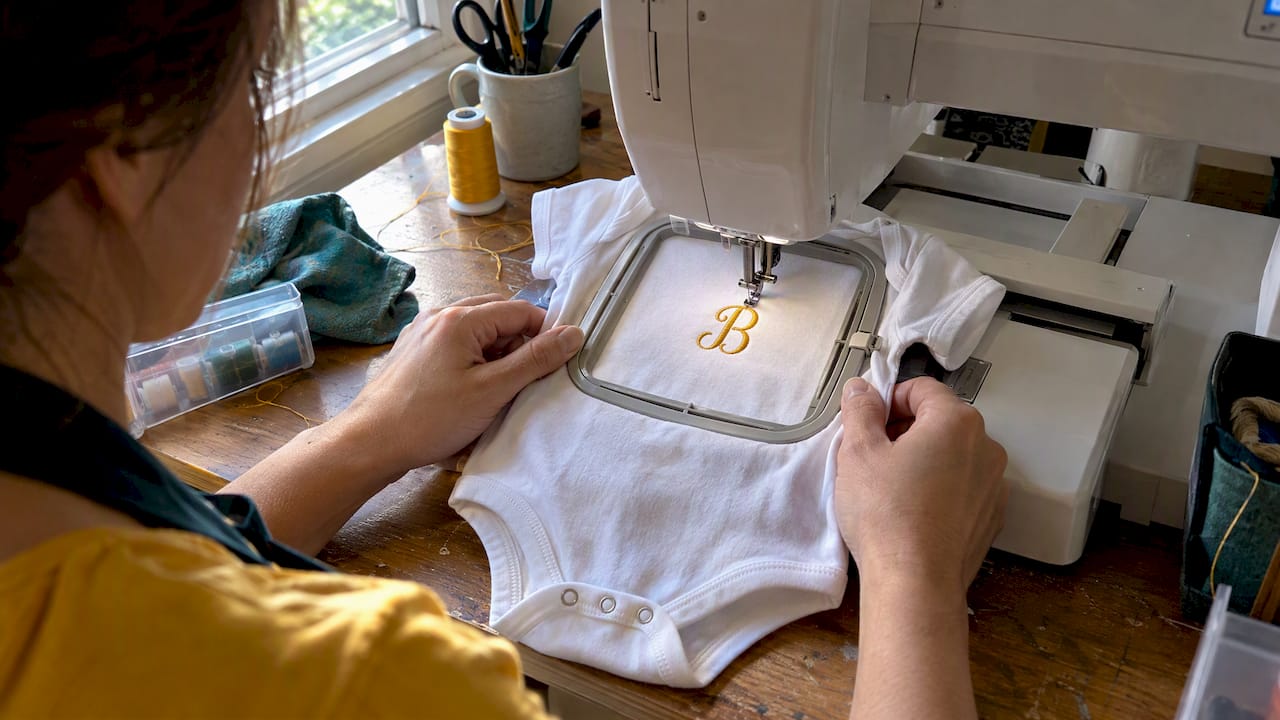
Where you put a monogram matters almost as much as its size. Center chest placement feels classic and symmetrical, drawing the eye straight to the design, while left chest placement mimics the look of a polo or uniform and tends to photograph well in close-up shots.
- Center chest: Best for solo monograms or short names; keep it level with or just below the underarm seam.
- Left chest: Works well paired with a small icon or when you want a more tailored, less centered look.
- Spacing from the neckline: Use the two-finger rule, leaving about two finger-widths of space between the collar and the top of the design, a layout heuristic described in embroidery technique guidance.
- Clearance from snaps: Leave some space above the first row of snaps so the design doesn’t pucker or distort when the onesie is fastened.
A monogram set too low can stretch or warp every time a diaper change pulls at the snap placket, so keeping it anchored higher on the chest panel protects both the look and the stitching over time.
Pro Tip: Mark your intended placement with a fabric pen before hooping, since even a slight shift off-center can be noticeable once the onesie is worn.
Safety and Attachment: What Recalls Show and How to Attach Safely
Choking hazards from detached decorations are a documented risk on baby garments, not a theoretical one. CPSC recall history shows that appliqués, glued-on decorations, and even snaps have detached from infant products over the years, which is why checking attachment method matters as much as checking design size.
A 2026 recall of personalized bibs and stroller bags involved appliqués and snaps that separated during normal use, underscoring why secure attachment is non-negotiable for personalized baby items.
- Choose sewn embroidery over glued or heat-pressed appliqués whenever the garment will see regular handling and washing, or consider other personalized keepsakes like laser engraved kids scissors for complementary custom gifts.
- Verify any purchased decoration or patch meets CPSIA compliance standards before it touches a baby garment.
- Avoid small, rigid embellishments (beads, sequins, hard plastic) entirely on infant wear.
- Use a soft fusible backing on the inside of the fabric to stabilize stitches and keep edges from curling against delicate skin.
Sewn-on monograms and professionally attached patches hold up far better than glued embellishments, which is part of why we lean toward embroidery or merrowed-edge patches for anything a baby will wear directly against the skin.
Hoop Sizes, Stitch Choices, and Method Selection
The production method you choose shapes what size and detail level is realistic. A 4×4 inch hoop suits newborn through roughly 9 month garments and keeps the fabric taut enough for clean stitching, according to practical embroidery guidance. A 5×7 hoop opens up room for larger garments or more elaborate multi-letter monograms.
- Stitch density and thread weight directly affect how small lettering can go before it blurs into a solid block.
- Fine digitizing work keeps small text legible, since poorly converted artwork tends to lose detail at the sizes a onesie actually needs.
- Heat transfer vinyl (HTV) works for one-off DIY projects, but it’s more prone to cracking and peeling after repeated washes than sewn embroidery.
- A professionally produced embroidered patch or digitized monogram holds detail better at small sizes than most home setups can manage.
For readers piecing together their own designs, our thread type primer breaks down how weight choices affect durability on soft baby fabrics.
Measuring and a Quick Test-Fit Process Before Committing
Before any design gets hooped or pressed, a few minutes of measuring saves a ruined onesie. Lay the garment flat and measure the chest width at its widest point, then measure the vertical space between the neckline seam and the top snap.
- Measure: Record chest width and neckline-to-snap clearance on the actual onesie, not a size chart.
- Mock up: Cut a paper template or piece of masking tape to the monogram’s exact dimensions and lay it on the fabric.
- Inspect: Check that the mockup clears the neckline by about two finger-widths, sits above the snap line, and looks centered when the onesie is buttoned.
This three-step check catches sizing mistakes before they become permanent stitches, and it takes less time than reordering a misjudged design.
Three Rules I Use When Personalizing Onesies
Three rules stick: default to 3M sizing unless the baby is already a known weight, always request a sample before committing to a full order, and choose sewn attachment over anything glued or pressed for skin-adjacent garments.
Lee Embroidery’s complimentary samples make that second rule painless, since confirming scale and color before production avoids costly redos. Safety and fit come before style every time.
— Bilal
How We Help You Get a Safe, Properly Sized Monogram
Choosing a monogram size on a screen is one thing. Seeing it stitched at actual scale is another. We offer embroidered patches and digitizing services that convert your monogram artwork into a file sized for the garment.

- We send complimentary samples so you can confirm size and placement before a full order ships.
- Our quote turnaround is quick, so you’re not waiting days to start.
Request a free quote on custom patches and we’ll help you lock in the right size before anything gets stitched.
FAQ
What size image works best for a baby onesie?
A modestly sized monogram or small graphic can fit most onesie sizes without crowding the chest panel. Smaller newborn garments call for smaller designs, while larger onesies can handle larger designs.
How many onesies do I need in each size?
This depends on laundry frequency and how fast your baby grows, so there’s no single number that fits every family. HealthyChildren.org recommends buying larger sizes rather than stocking up on newborn-only pieces, since many babies outgrow newborn clothing quickly.
Can a 7 pound baby wear 0-3 month clothes?
A 7 pound baby is within newborn range according to Carter’s size guidance, which places newborn sizing around 6 to 9 pounds, but many 0-3 month garments run a little roomy and can still fit. Checking the specific brand’s size chart against the baby’s current weight is the most reliable way to decide.
Is 3 months the same as 0-3 months?
Yes, “3M” and “0-3 month” refer to the same size category on most labels, covering babies roughly 9 to 12.5 pounds and 21.5 to 24 inches according to Carter’s sizing. Brands occasionally use slightly different cutoffs, so checking the specific label is worth the extra minute.
Do I need a professional patch instead of DIY iron-on?
An embroidered patch is an option for garments worn directly against skin. If you’d rather try a safe iron-on method yourself first, our guide to patching baby clothes walks through a quick, secure application approach.
Sources
- Cartersoshkosh
- Cpsc
- [How to Embroider Onesies: Essential Techniques for Flawless Results
– MaggieFrames](https://www.maggieframes.com/blogs/embroidery-blogs/how-to-embroider-onesies-essential-techniques-for-flawless-results) - Healthychildren